DIGITAL - art, video, and photo editing
/ PAINT SHOP PRO PHOTO X2
Highlighting.
This tutorial is for Paint Shop Pro Photo X2, it will teach you how to highlight an image with colored circles, squares, arrows, text, and even other images. For this tutorial, we will use a screen shot of the layout of Paint Shop Pro. We will then crop that to a useable section. If you don't know to take screenshots and crop please check out this tutorial first.
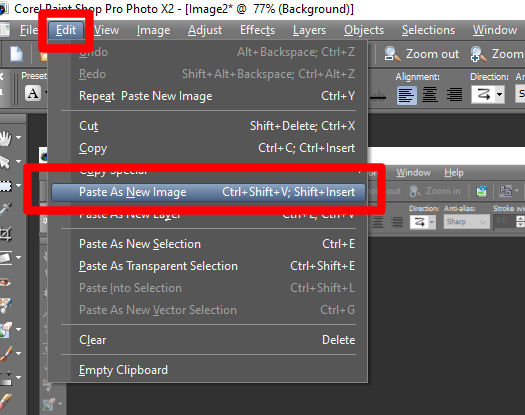
Now we want to go to Edit - Paste As New Image, or Control+Shift+V.
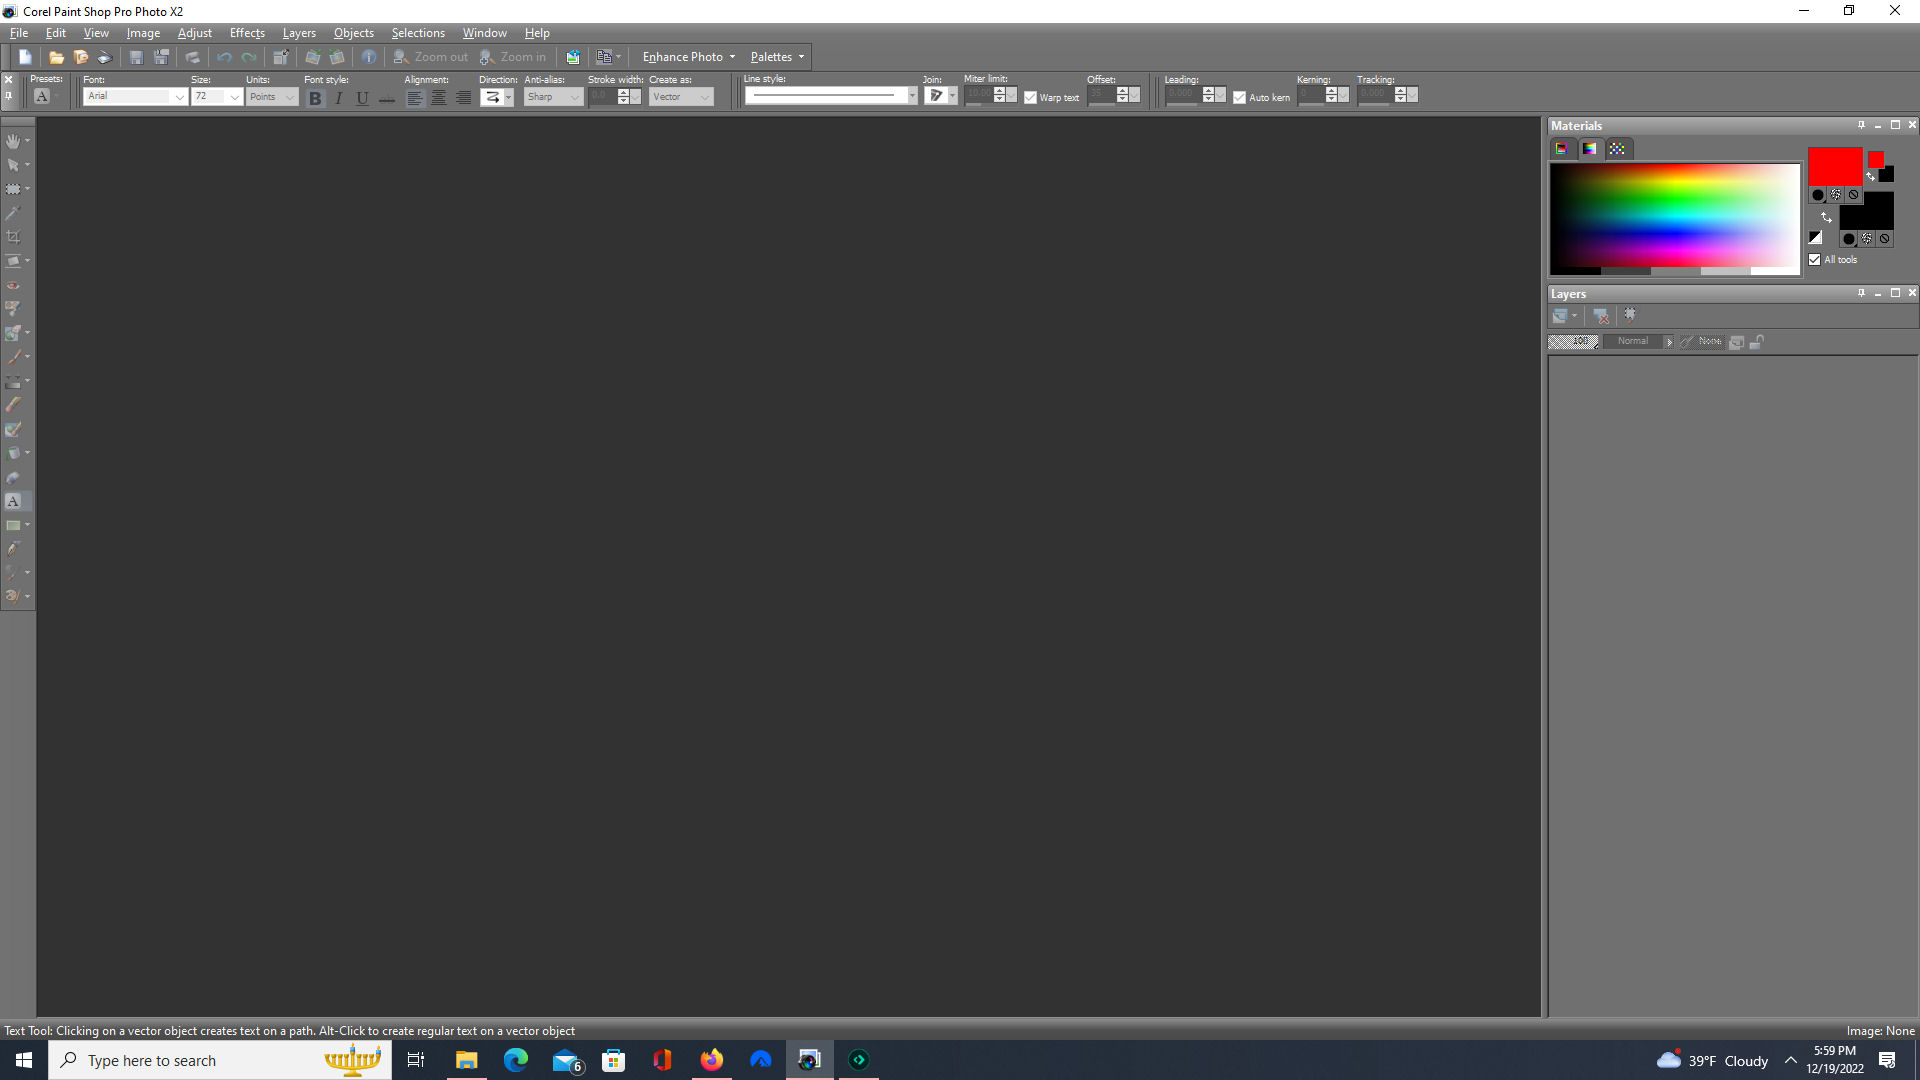
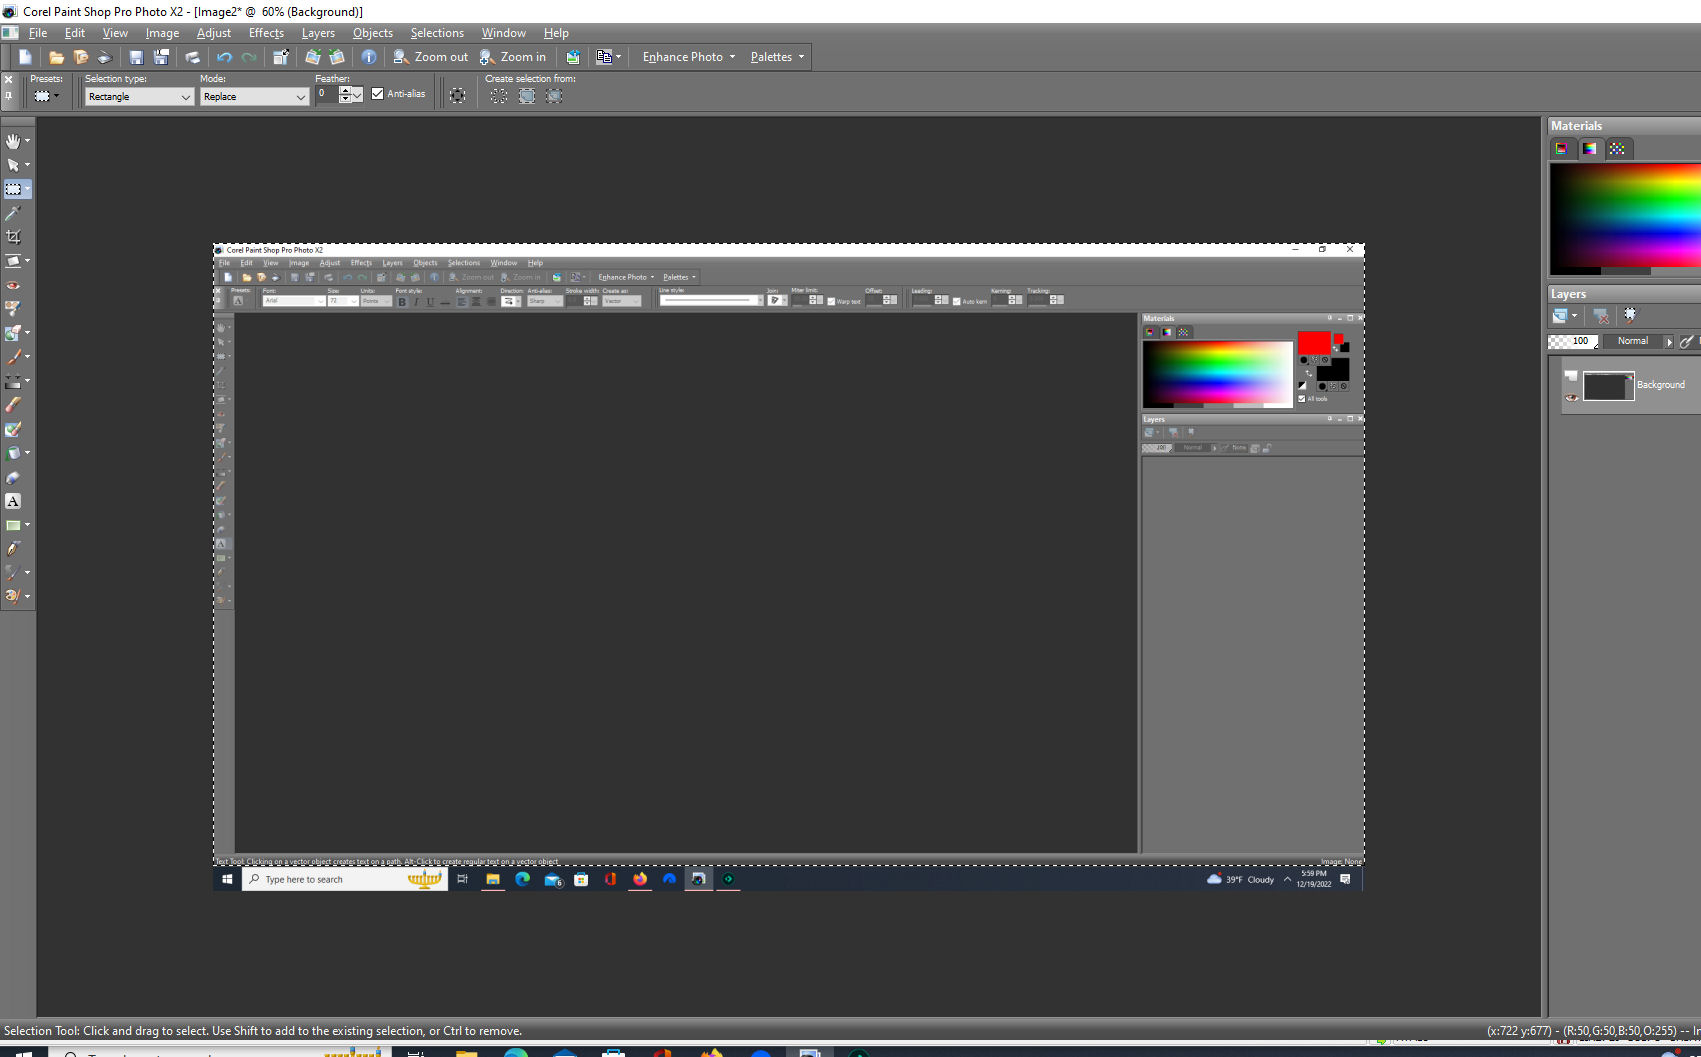
If all goes well, your newly pasted image will look similar to this image below.
You can see the taskbar down below (don't forget to maximize your newly imported image btw). So we will first crop that part of our image out.
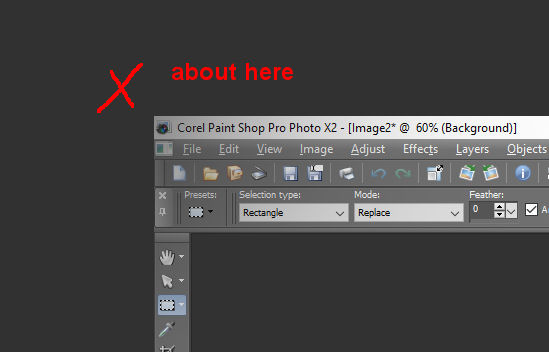
Press the "S" key to go into selection mode. For a crop like this I usually set the mouse cursor at a virtual point somewhere off the canvas. In this case maybe a quarter of an inch up and to the left.
And then I will left click and hold the left mouse button down and draw out a lasso that covers the whole image right to where the task bar begins, and then let go of the mouse button and see if I got it.
If so? You can simply hit Shift+R to crop it, or just hit the right mouse button on an empty part of the canvas to release the selection. And even if you cropped it already and its not to your liking, simply hit Control+Z to undo and go back one processed move (remember that, undo is your friend in about all Windows programs).
Now you have the image, it is cropped and ready to go. Lets imagine we are in a forum seeking support for a program, we will need to be able to show our problem detailed so that we might can find a solution.
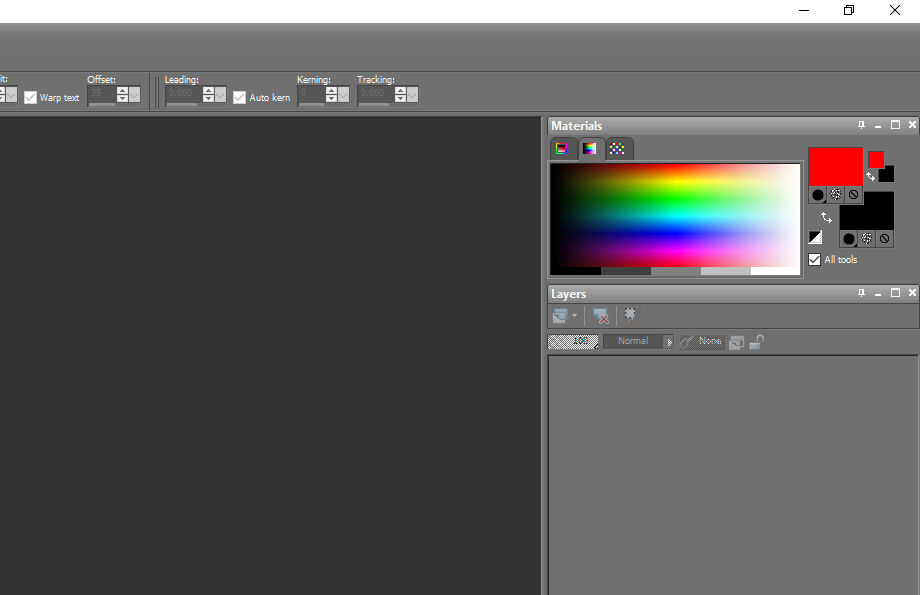
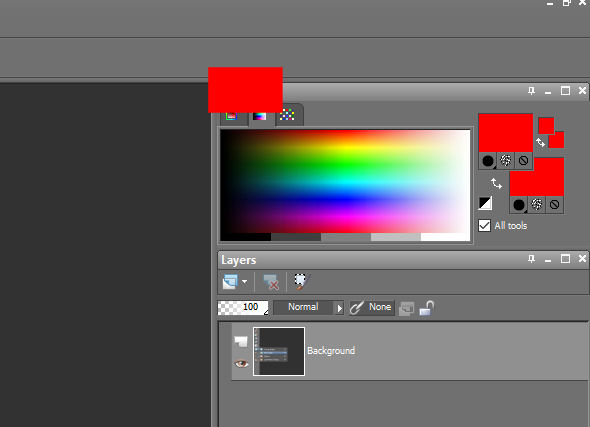
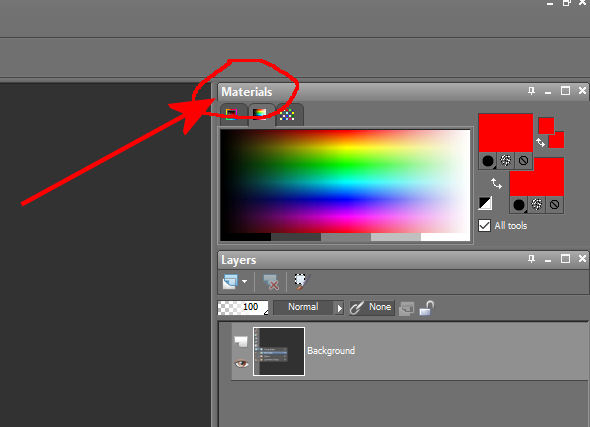
We will draw out a small lasso and crop the top right quarter of the screen so that the materials panel is a big part of the image. It should look similar to the image below. Or you can totally just save the image below and open in PSP and be ready for the next step.
Now lets draw a colored square over the words "materials". To do that you will first need to select the tool. You can find it on the left close to the bottom of the tools toolbar. Or press the "G" key to activate it.
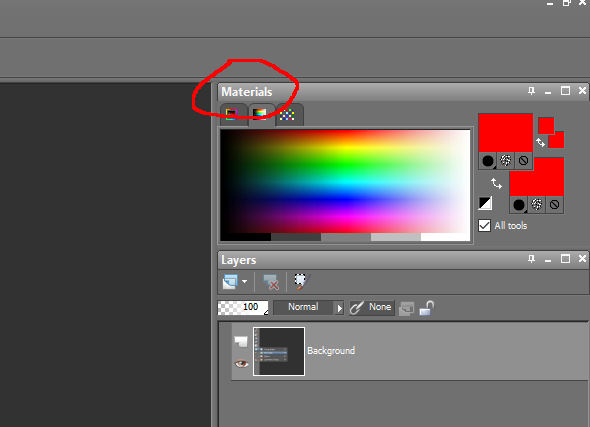
Once it is activated, its as simple as pressing the left mouse button and drawing out a lasso and releasing to draw a square. But before you do, you might want to select color(s) first. Paint Shop Pro Photo X2 offers two slots too choose color. On the upper right of the materials tab you see the two colored squares. The top square is Foreground and Stroke, the bottom square is Background and Fill. There will be times you may need both (like in text fonts), or perhaps only one (like in this example).
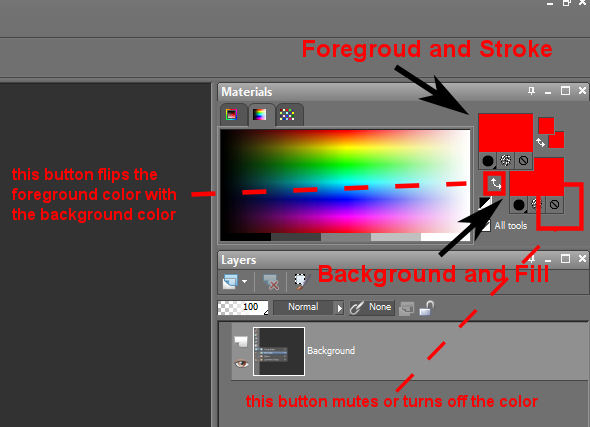
I find that most highlighting is done with the color red. Press the top square (Foreground color and Stroke) and choose a color (tip, when the cursor turn into an eyedropper you can also choose the color of anything currently on screen). Now for the sake of highlight squares, circles, or rectangles, you are going to want to make sure to press that transparent button (last of those three buttons on the right) on the bottom square (Background color and Fill), ELSE you will make a highlight square that is full of the color you chose. So try to make a highlight of the word "material". I will try to also show what happens if you forget to hit that transparency button on the Background color.
After you made that highlight square, you will notice that PSP created a new vector layer over in the layers palette to the right. If you don't see it, you can press "F8" a few times to toggle visibility of the layers palette. You can press that plus icon and expand to see what is actually there.
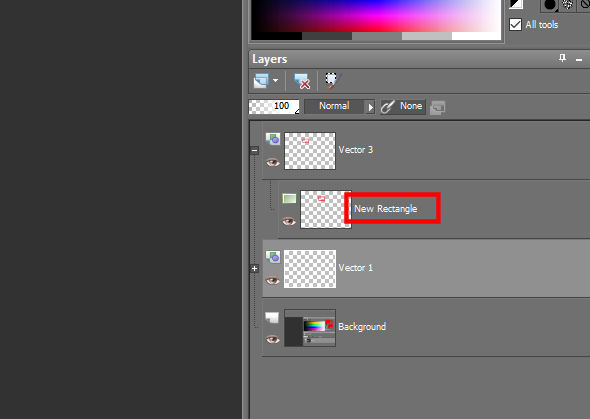
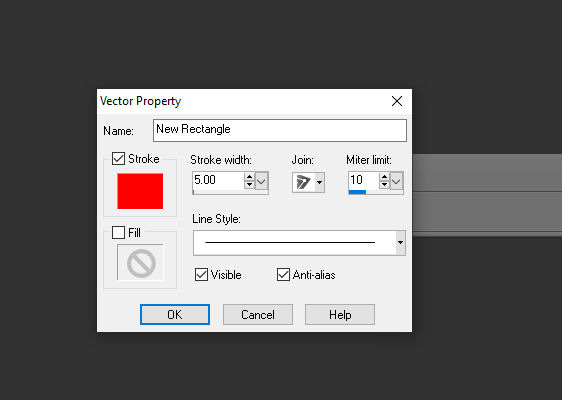
You can then double click on that layer to bring up the properties box.
Here you can do some interesting things on the fly and see the changes live in real time. I guess you could liken this to non destructive editing in an audio program. If I want I could change colors, toggle colors on or off, and other options. I find the option I use most here is the "Stroke width" option. In this case it will govern the thickness of the line that is essentially the "wall" of the box. I also find the "Line style" option useful as you could even change the line into dashes (as seen in a pic in this very tutorial), or even arrows.
But lets say you just want to circle the word "material" on the image yourself, free hand. Here you will want to select the paint brush, its about halfway down on the tools toolbar, or you can simply press "B" on the keyboard to activate it.
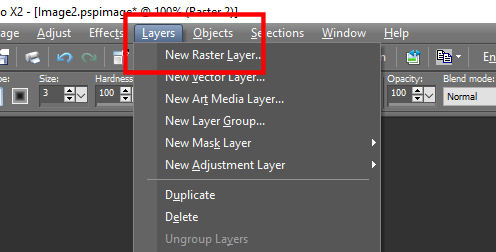
You will likely also need to make you a new raster layer for your paint brush. Choose layers - New Raster Layer from up top.
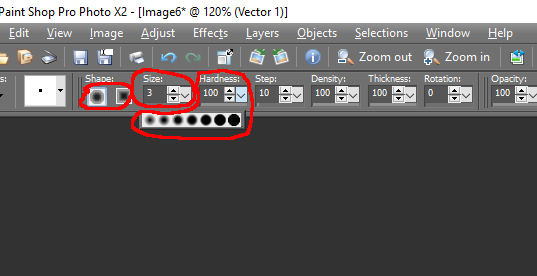
Once the paint brush has been selected, I think most of the important options you will need are up to the left of the paint brush options.
- Shape - More circular or square brush shape.
- Size - How big is the brush overall?
- Hardness - Will it have a harsh edge, or a smooth fade out (aka a spray paint can)?
Now with your empty raster layer selected, and paint brush activated, simply "draw" using your left mouse button. Draw designs, circles, squares, text, etc etc etc.
Now I will try to add an arrow pointing to the circled area of the image. For that I will be using the pen tool or pressing the "V" key. Here I encountered a small problem that seems to be associated with this version of PSP. Once the pen tool is selected, you can simply draw out a line (if all goes well). If it does anything else or nothing at all (as it just did with me), there seems to be a selection situation going on. I liken this to a straight shift car getting gears jammed up. The solution for me was to select the text tool (which we will be using in just a bit just not atm) and do nothing basically then go back to the pen tool. I drew a line out to my circle.
And finally, I'm going to be using the text tool to create much more professional looking text. The text tool generally creates its on layer when used or places text into the closet vector layer already there. The way it works is you find a general spot you would want text
and get started. The size will likely be your most important option to begin with, but I usually try to lay it down first, and then tweak its options afterwards. In this example I'm going to write "What is this?" Some times you will have to space words and even break things off into new sentences or lines to get the effect you are after. Once the text has been made and applied, then the tweaking can begin. Double click on the layer and bring up its property box. Here there are many things you can do (make sure the text is all selected or highlighted in blue when editing. Change colors, size, and my favorite, change out the fonts themselves. You can collect fonts all day online, some are free, some are paid. Fonts might be one of the quickest ways to add flavor and style to a piece of digital art. I will just be using the simple "Arial" font as essentially everyone has it.

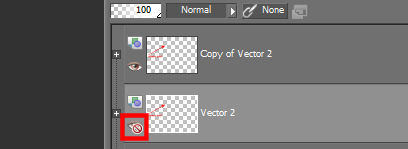
Going back to the thing about having TWO colors for text. In this case I used a red color for both colors. But you can often make text jump out more by having a different color for the two slots to give the text more depth. Here I will use red as the top color, and black as the bottom color. I just tried it and with THIS font (Arial), I did not notice a difference. So now I will add an effect known as drop shadow to the text and the arrow. Just right click on the Vector layer and choose "Duplicate". It will create a duplicate vector layer just above. Now press the small eye on the one below and turn off visibility.
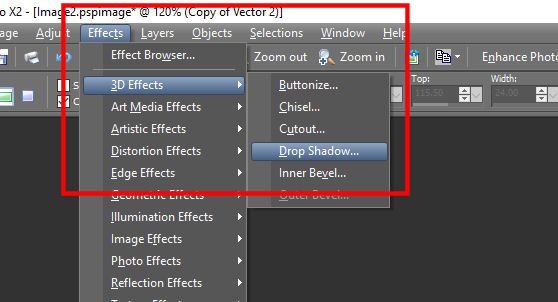
Now on the duplicated layer, right click and choose "Convert to Raster Layer". Now go to Effects - 3D Effects - Drop Shadow.
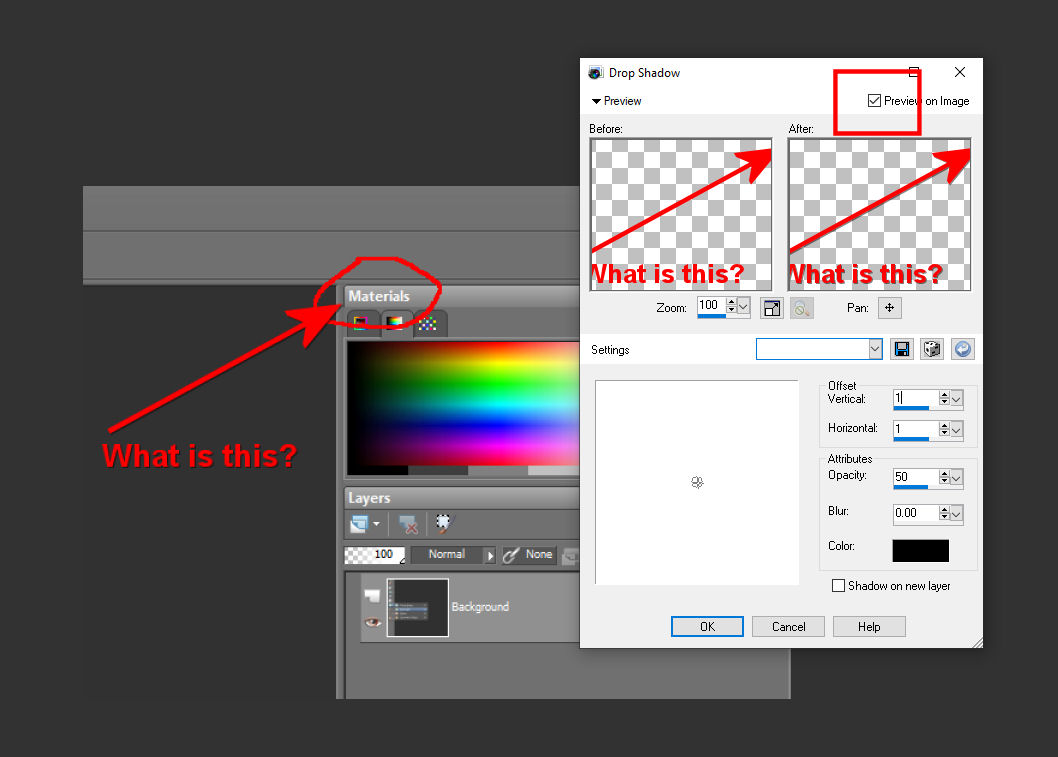
The properties box will pop up, make sure "Preview on Image" is checked in the upper right hand corner and you can see the changes in real time!. Here I turned the blur off and turned the vertical and horizontal positioning of the drop shadow just so the effect barely enhanced the text and arrow.