This tutorial is for Paint Shop Pro Photo X2, it will teach you how to perform what I call a "whiteout", "blackout", and also just a simple colorize. For this tutorial you can download a copy of the cut out stop sign by simply hovering over the PNG image (with transparent background) below and right clicking and choosing to "save as" or "save image as" and putting the image somewhere you can find it on your pc .
![]()
Then we need to get that PNG (and png is what you need for transparent backgrounds btw) into Paint Shop Pro. There is primarily two ways to do this, you can simply use "File / open -" and navigate to the picture. Or with PSP open. just simply drag and drop the image into PSP (which is what I usually do). Either way, the image should appear in PSP in a window. I usually quickly maximize that window so it fills all of PSP.
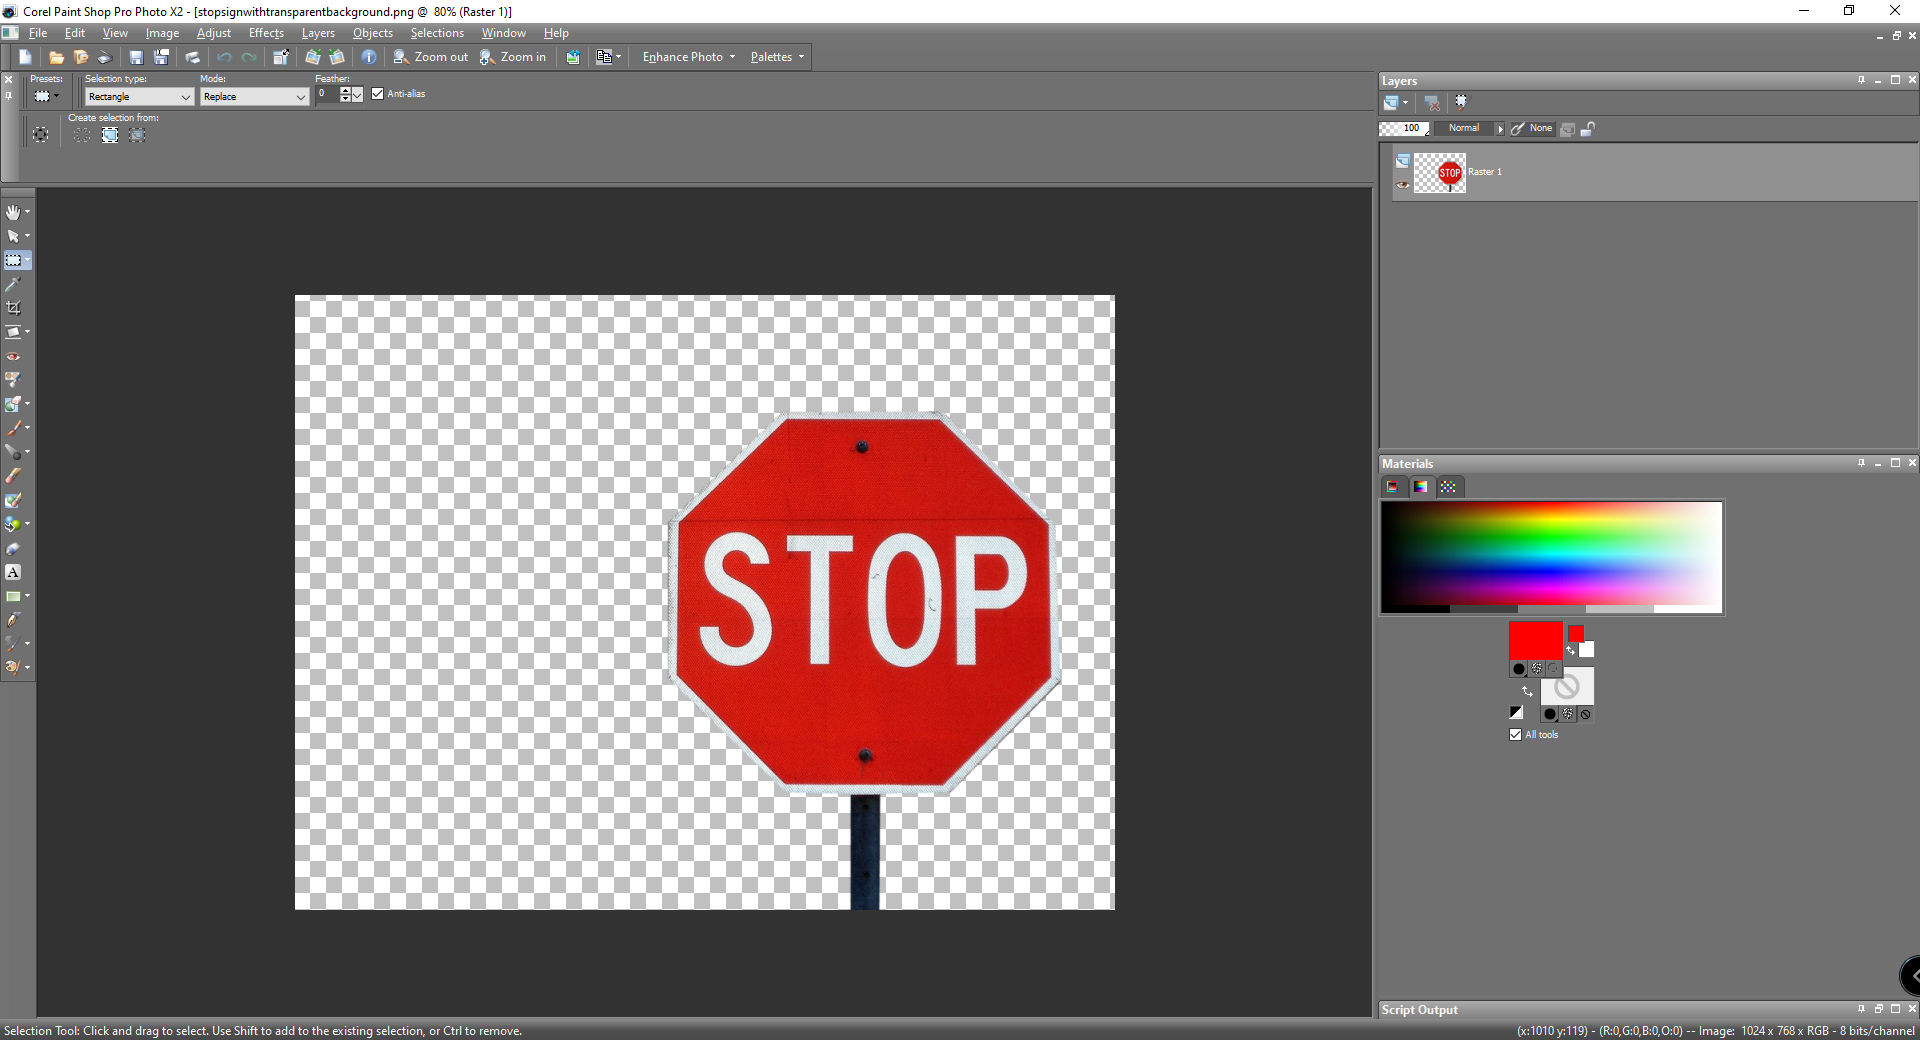
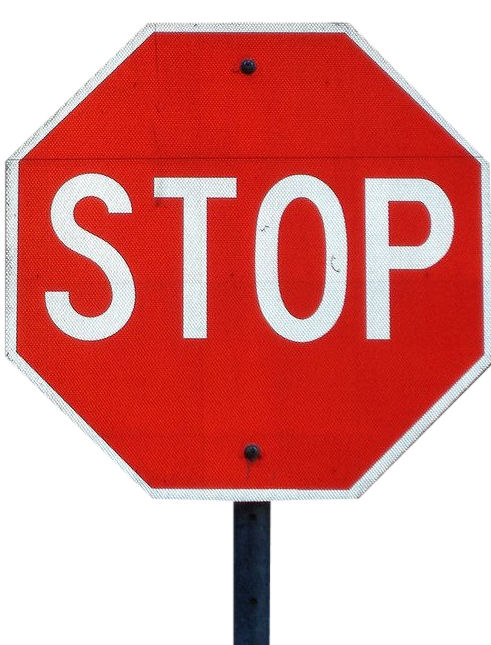
If everything goes well, your PSP should look like the pic below. Not considering how I have my materials layed out and colors chosen.
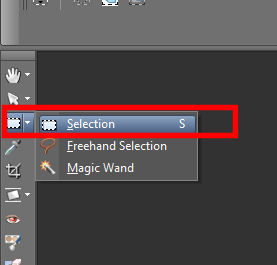
At this point, we probably need to crop this image and have just the stop sign with not so much empty space on the left of it. This can be easily accomplished by pressing the "s" key on the keyboard, or pressing this button to go into "selection" mode.
While in selection mode, use the left mouse button to draw out a lasso selection just around the stop sign.
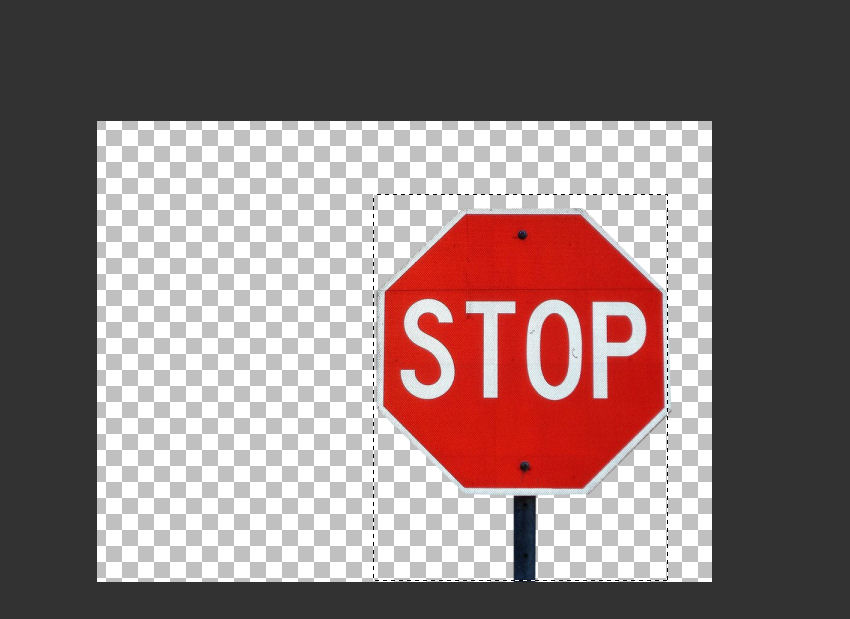
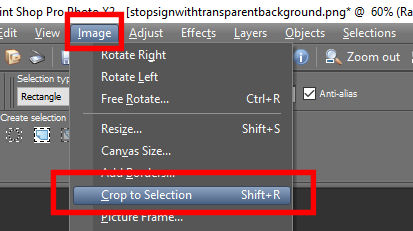
If you are happy with your selection, then crop it, with the selection still active hit "Shift+R" on the keyboard, or up top go to "Image - Crop to selection".
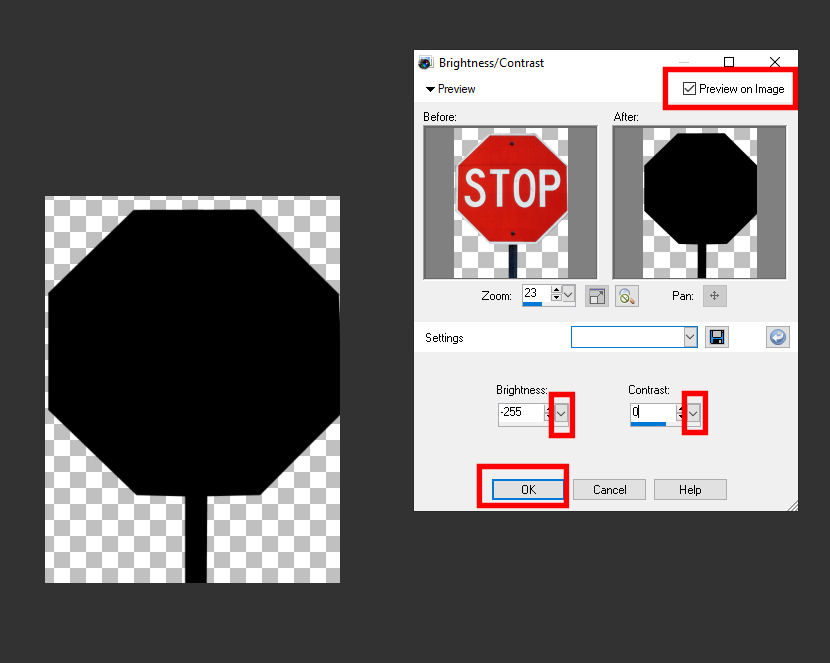
Whiteout - What I call a "whiteout", is essentially cranking the brightness and contrast (actually leave the contrast at zero) to maximum brightness and it will simply make the entire object white, and all details will be lost. Up top go to "Image - Brightness and contrast - brightness and contrast" or hit "Shift+B". The effect window will now pop up.
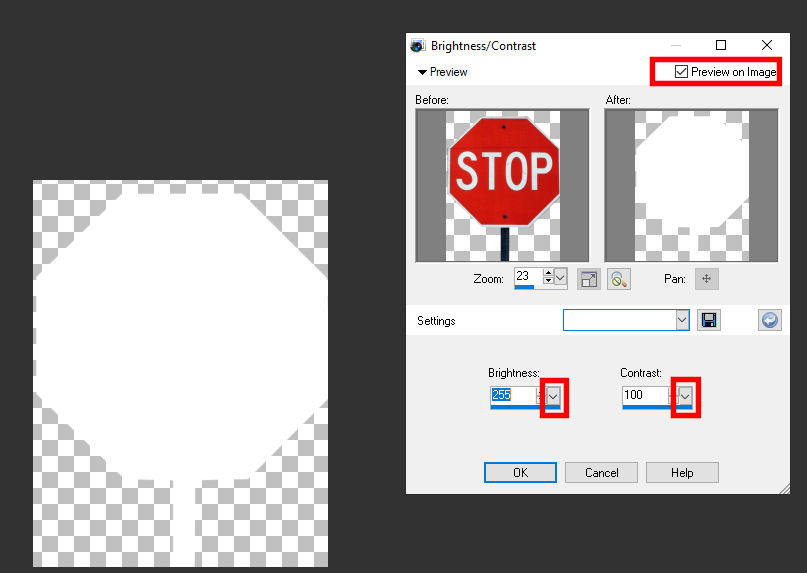
Make sure that the "Preview on Image" in the upper right hand corner is checked. You can then see your changes reflected live to your image. Now either push the small arrows up or down 1 at a time (the really slow way) or just grab the larger down arrows with left mouse and drag to the right making it have maximum Brightness(255) and Contrast(100). You then simply hit "OK" to apply the effect. The image is now completely white. Press "Control+Z" (another excellent shortcut to know for almost all Windows programs btw) or Edit - Undo" to go back one step and return it to just how it was before you performed the whiteout.
Blackout - If a "whiteout" is maximum brightness and contrast applied to an image (thus rendering it pure white), then a "blackout" is just the opposite, cranking the brightness and contrast all the way down...well sort of......while this needs -255 on the Brightness, only put the Contrast on zero (else it will be a GRAY image). Try it now.
Colorize - Before we colorize, simply hit "Control+Z" or "Edit - Undo" to UNDO and go back one step and return the stop sign to its former self. I will first show you simply what happens when you Colorize an image just how it is. Go to "Adjust - Hue and Saturation - Colorize" or simply press "Shift+L".

When I adjust the "Hue" slider it reminds me of turning the "tint" knob on an old color television. And when you're happy with it just hit "OK". Ok hit "Control+Z" and UNDO that, now lets try the Saturation slider.
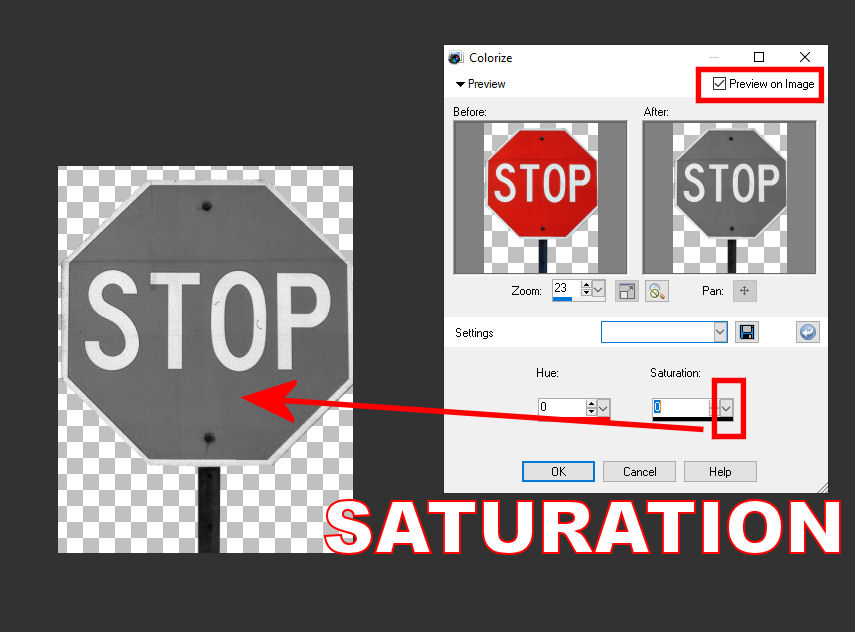
Going back to the old color TV analogy, if "hue" is like the "tint" knob, then "saturation" is like the "color" knob, by moving the slider totally left (0), I was able to completely suck all the color out of the image, essentially rendering it a black and white image.
This next trick is going to show you how to use a whited out image to achieve a full color silhoette of any color you like. Repeat the steps to "white out" the stop sign image like above (and you might need to UNDO the saturation step if u haven't already), and now we are going to colorize, but in a slightly different way (method). Up top go to "Adjust - Hue and Saturation - Hue / Saturation / Lightness" or simply press the shortcut "Shift+H".
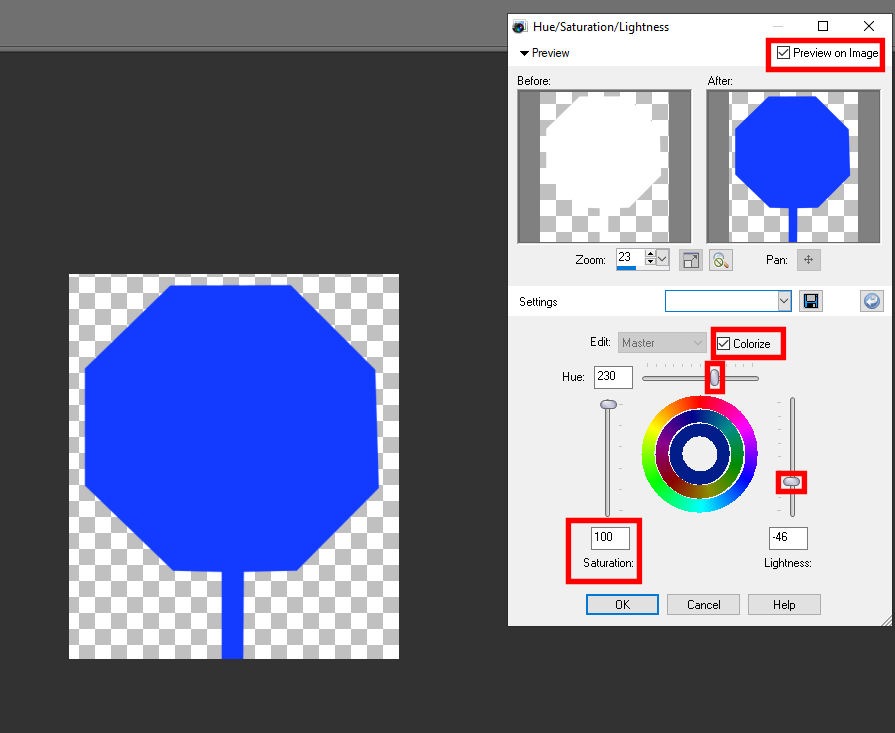
This FX window looks slightly different from the last "colorize" window. This window adds another dimension to the colorized editing......."lightness". As before, first make sure "Preview on Image" is checked in the upper right hand corner, then make sure the "Colorize" box is ticked. I think the moment you check that box is checked it puts your saturation all the way to zero, so immediately pull it back up to 100. I find that I usually have to set Lightness to less than half way before I start seeing meaningful changes when I grab the Hue slider. Using a combination of these three sliders I have highlighted, I find I can essentially get any color I want or need from a whited out image.