DIGITAL - art, video, and photo editing
/ PAINT SHOP PRO PHOTO X2
Creating laser swords, plasma glows, lightning, tracer fire, and more.
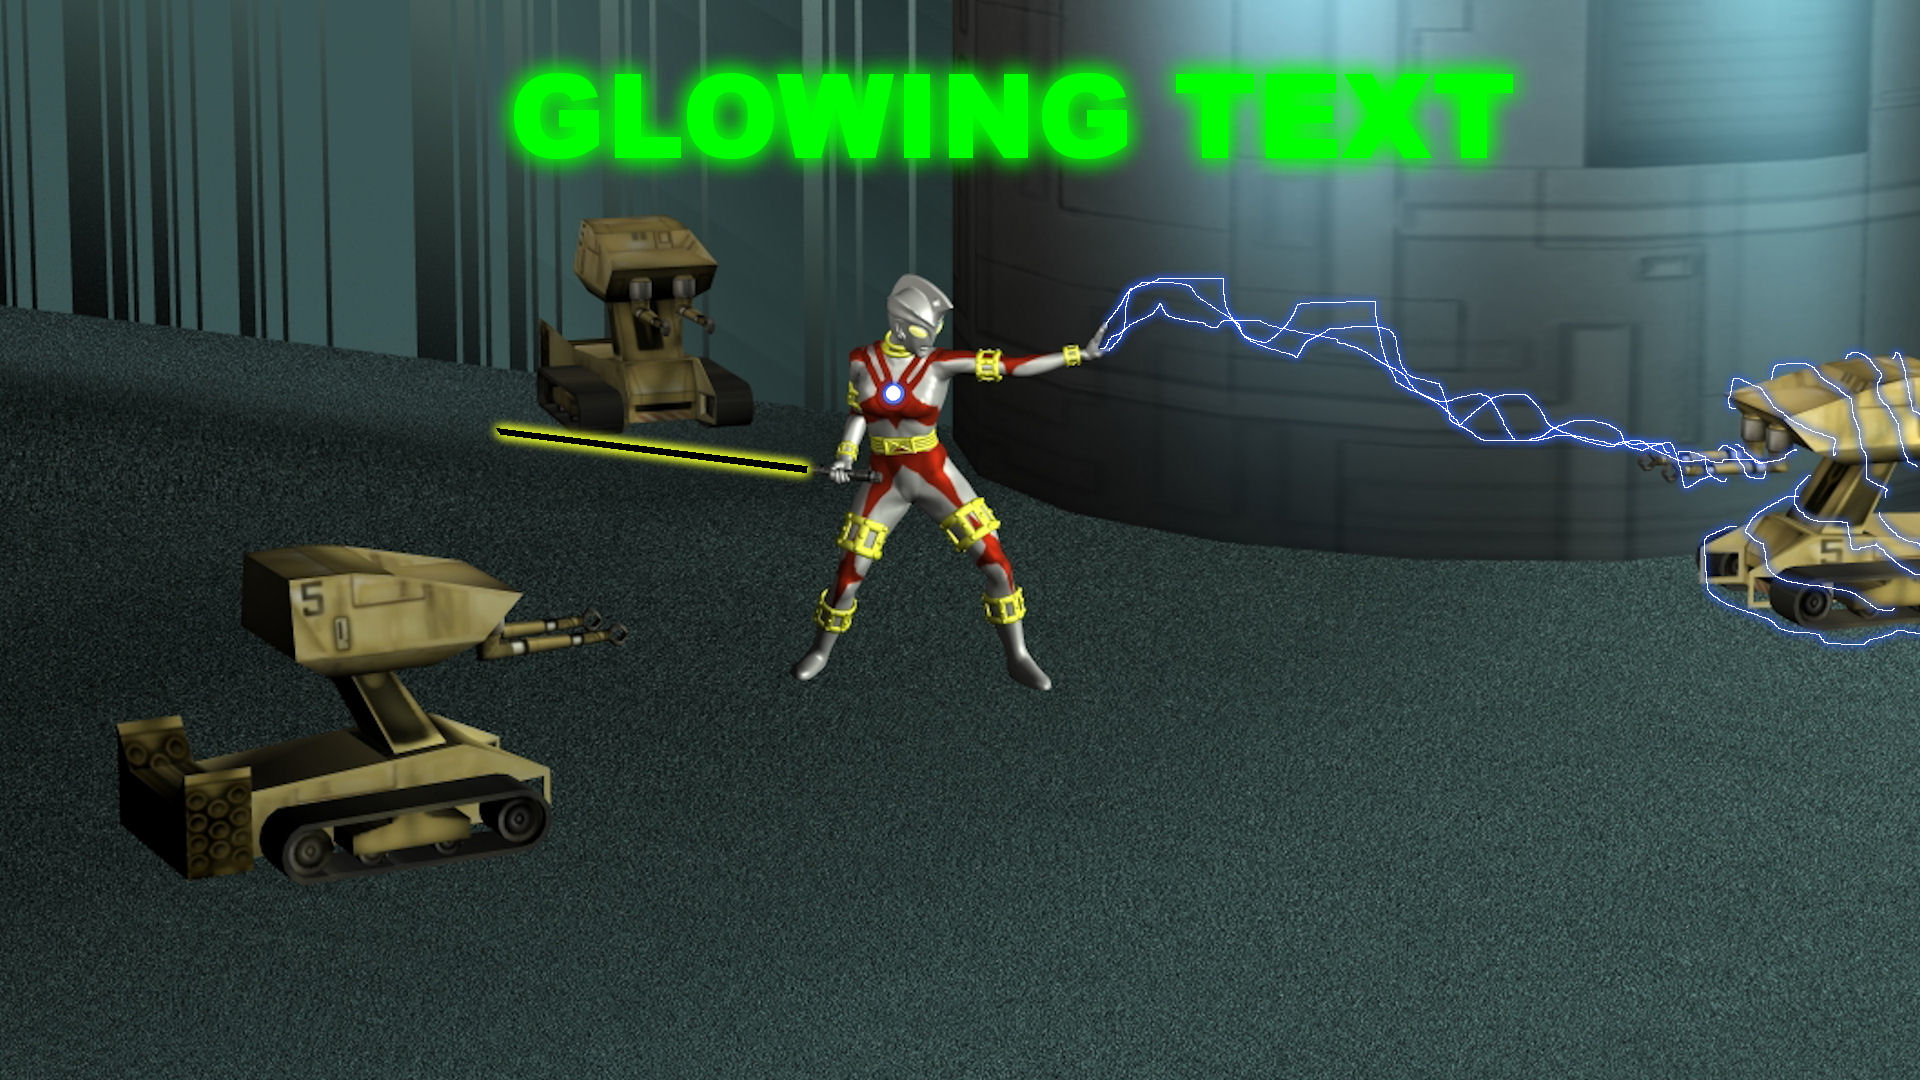
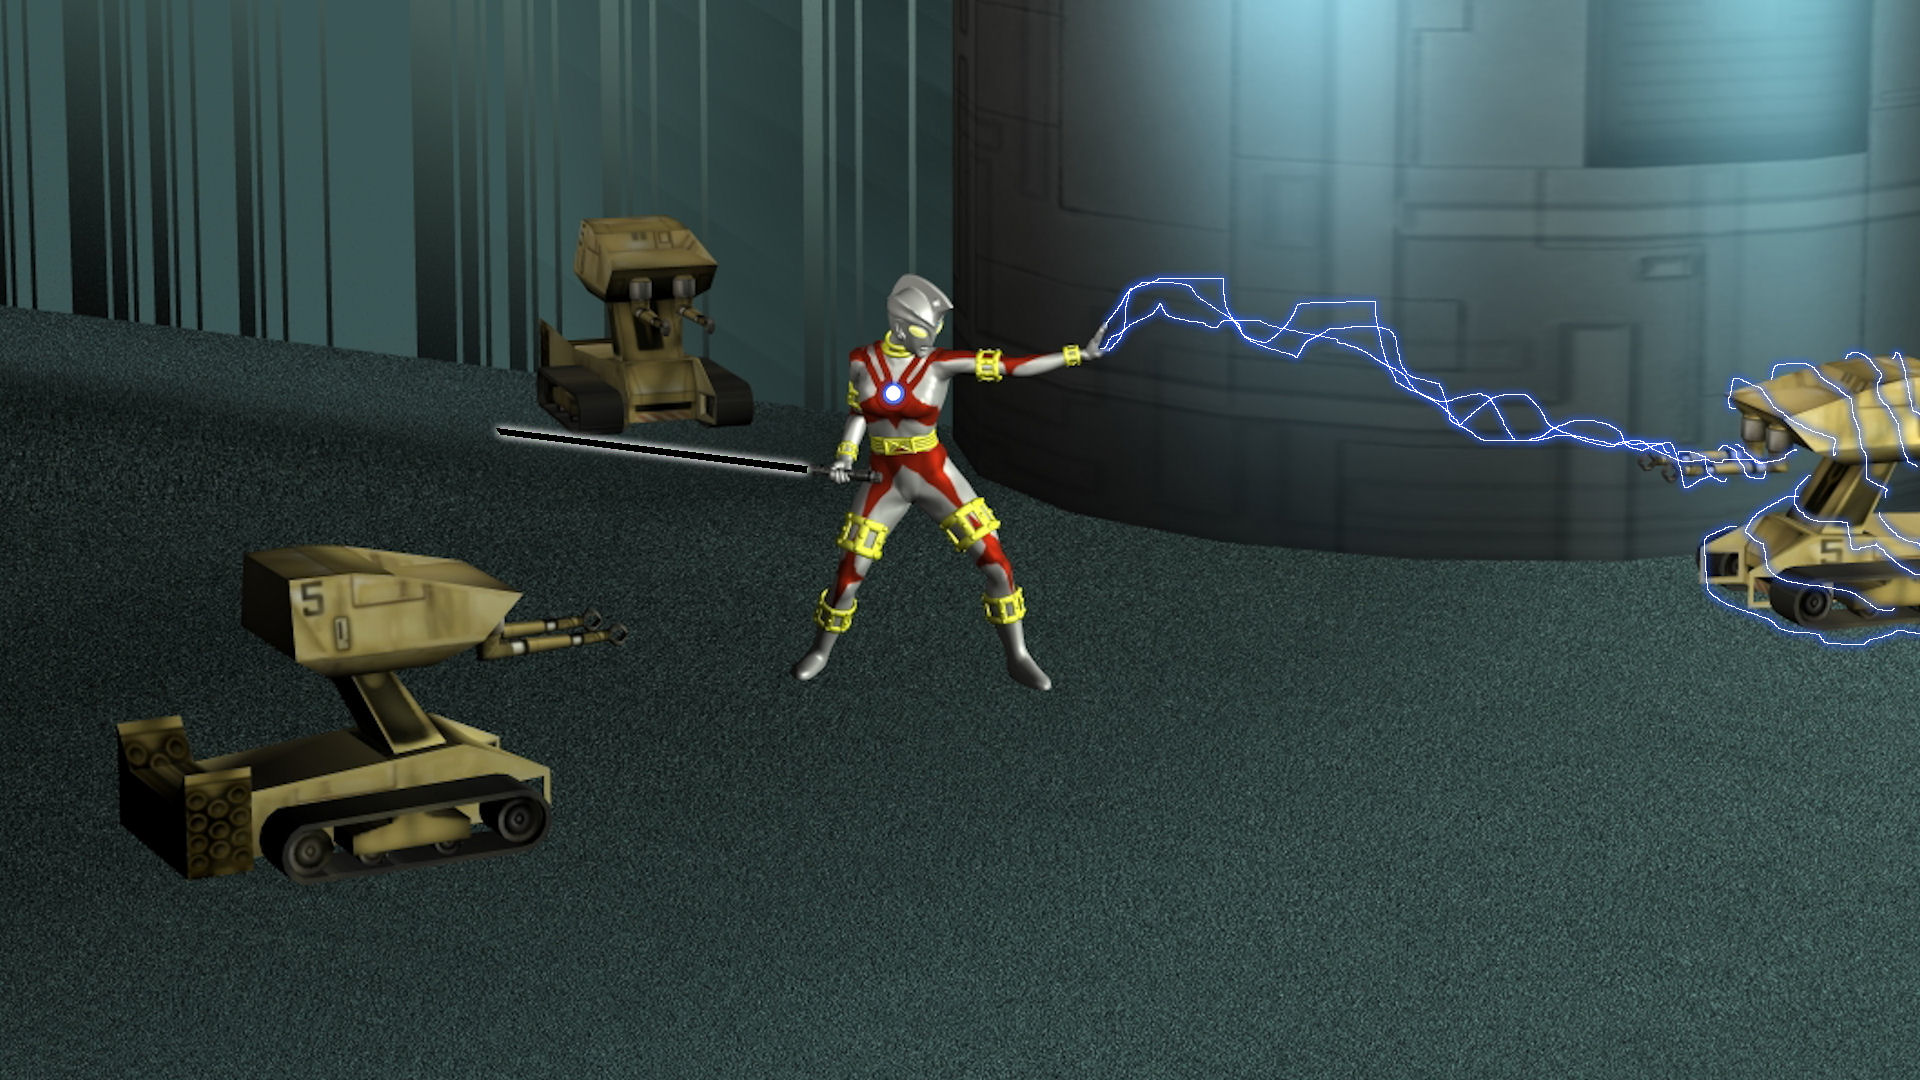
This tutorial is for Paint Shop Pro Photo X2, it will teach you how to create laser swords, plasma glows, lightning, and more. A very popular effect in photos and movies is creating things that glow. Whether it's laser swords or beams, glowing eyes, orbs, and rocks, or just lightning (and who can forget glowing text?) This a fairly easy effect (IMO) to create using Paint Shop Pro Photo X2 and many other image editing softwares, yet still very powerful and professional looking. For this tutorial you will need the image below. Right click on it and "save as" somewhere you can easily find it.

First off, lets get that image inside PSP. You can open it the old fashioned way, by going to File - Open and choosing the file you just downloaded. Or you could try simply dragging and dropping the file into PSP. Either way, the first thing I tend to do is maximize the window of that image first. The basic jist of this "technique" is there will be two things to consider. 1. A solid white coloration / object on a layer by itself (think of this like a white hot center or core). 2. A colored and BLURRED duplicate of the solid white object on a layer beneath it. The amount of blur and duplicates of this layer will govern the intensity and brightness of the "glow" effect. Using this simple method, you should be able to create a plethora of diverse and high quality effects.
1. Laser swords -
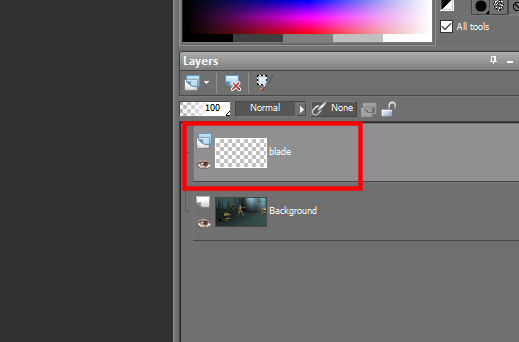
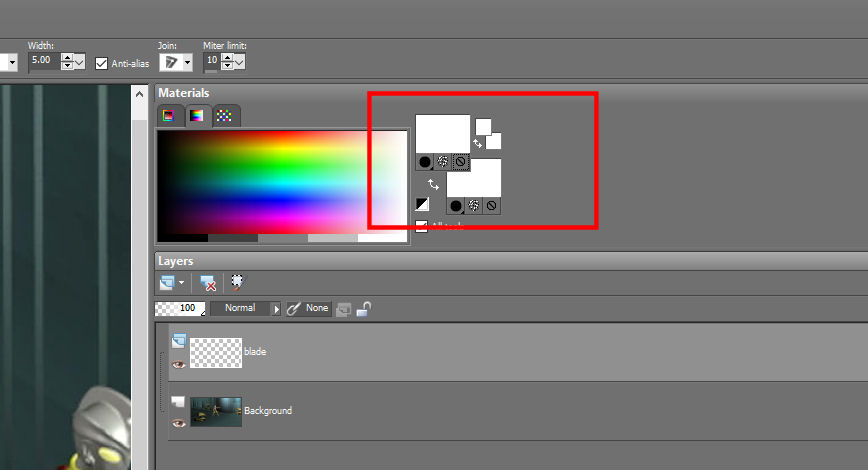
With PSP opened and the lesson.jpg image loaded in and maximized. It would probably be wise to go to File - save as (or F12) and choose to save this project as a .pspimage. This should be the default choice and since the jpg is called "lesson", PSP went ahead and chose the name lesson.pspimage, and chose the same directory that the lesson jpg was in, so I chose that. The .pspimage format is a lossless format (for PSP), and one that you will be able to reopen and get back to the layers and other things that you will be creating today. We will first add a new layer for our white coloration or object. Name it or not its up to you, I named mine "blade".

Make sure your new layer is selected (notice it is a lighter gray color indicating it has been selected?).
Now hover your mouse cursor over where the laser sword blade is on the lesson pic and using your mouse wheel "roll up" to zoom in, and get the blade in the pic zoomed in front and center in PSP. If you don't get it zoomed in to your liking, you can easily roll the mouse wheel down and zoom out and do it again.
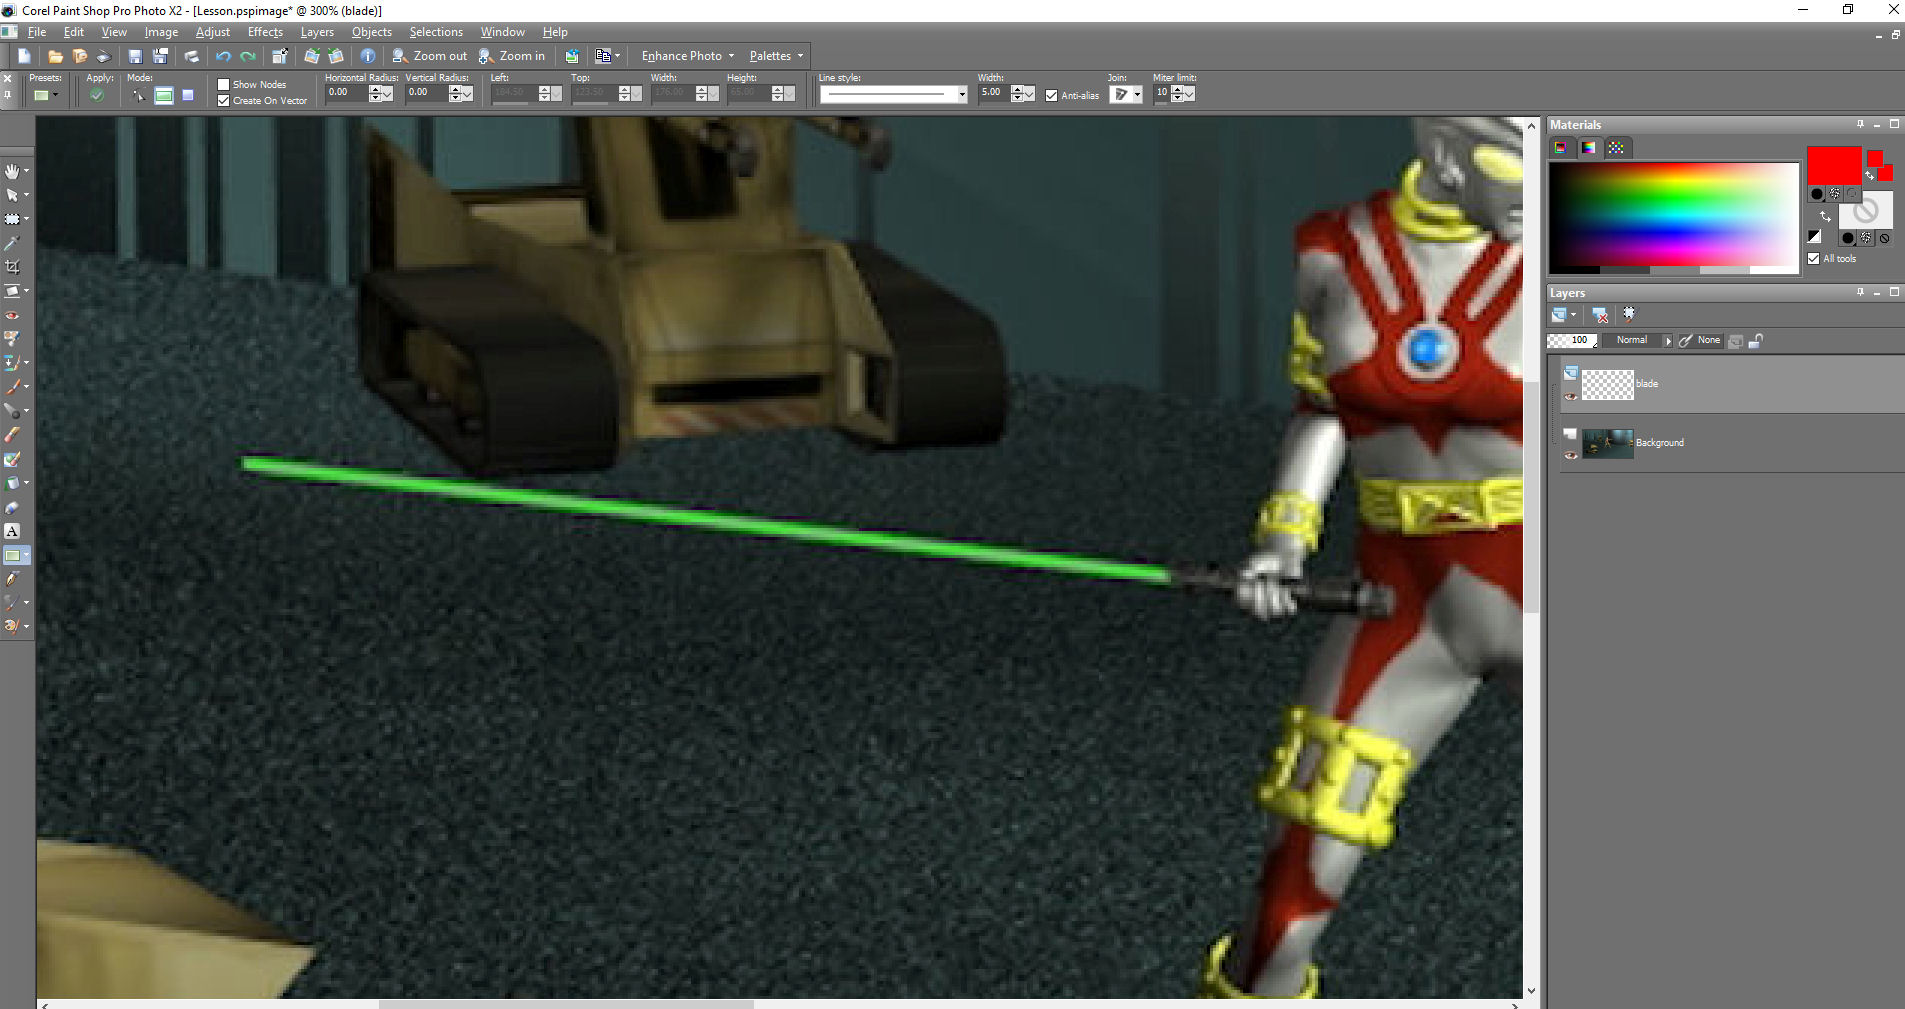
Now we are going to be using a free-hand selection in "point to point" mode to create a unique selection to fill with white paint to create a solid white coloration, or "blade" for our laser sword. In many cases, you will be able to, and will probably want to, use as few clicks as possible in point to point mode to create a selection for your laser sword white object. In the pic below I show you how that you can do it in just FOUR clicks of the mouse. The first point LEFT CLICK, the second point LEFT CLICK, the third point LEFT CLICK, the fourth and last point RIGHT CLICK, PSP will calculate the points and create a closed loop selection for you.
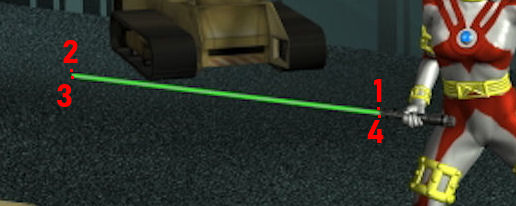
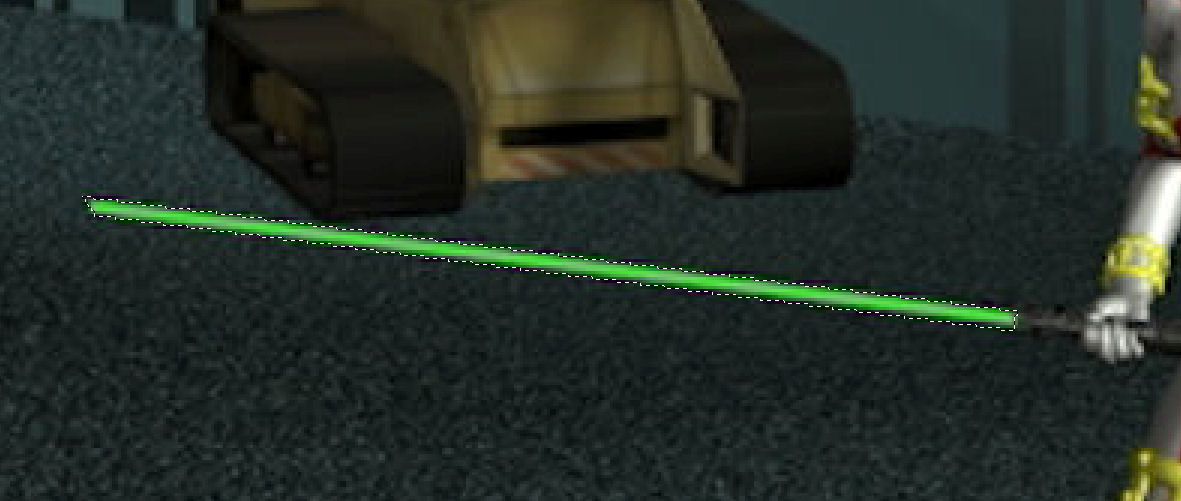
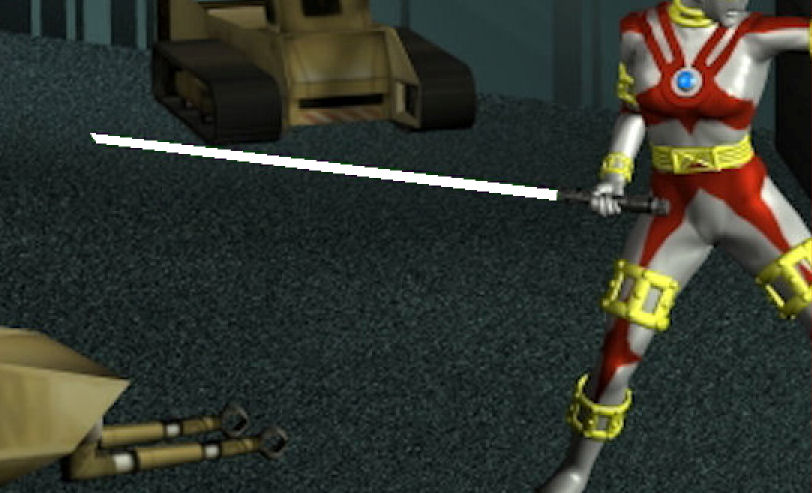
You now should have an appropriate selection for your white object, now you need to fill it with paint! Note in THIS exmple you will be able to get away with the four point selection, however if you wanted a rounder smoother end to a laser sword, you will likely want many more points then just four!
In your colors palette, make sure you have a white color selected.
Now there a a few ways to fill this selection with color. You could just use the Flood Fill tool (F key) and click within the selection and it would fill it all with the chosen color. But what I usually tend to do is just use the Paint Brush (B key) and size it pretty big and just swipe through the selection. You can now hit "Control+D" and drop your selection to remove the selection.
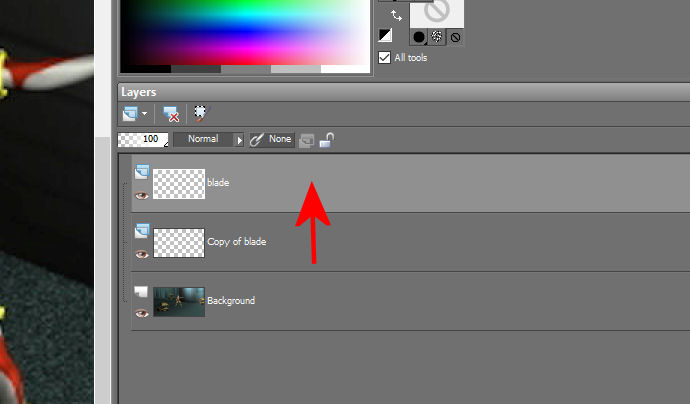
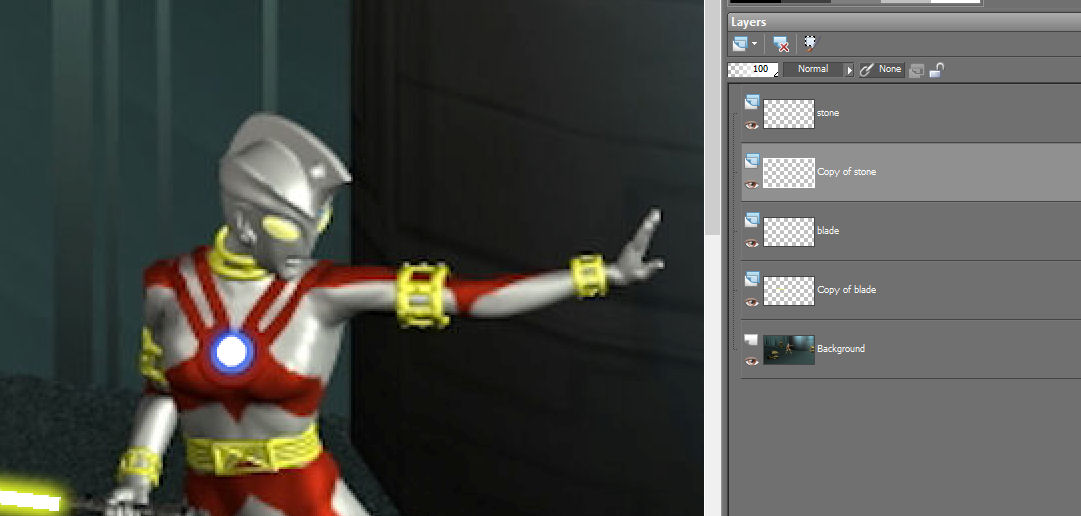
Now that you have a layer with a white polygon on it. You can simply right click on that layer and choose duplicate.
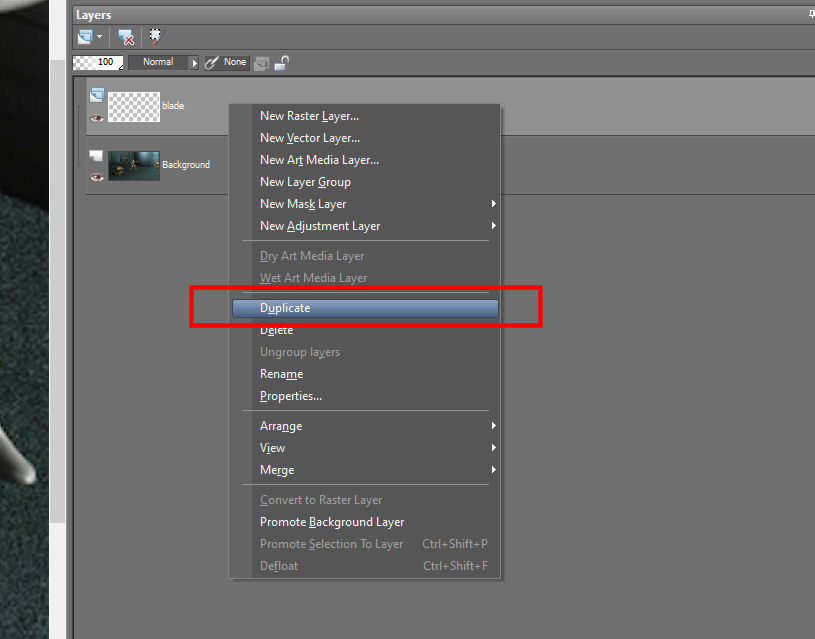
For me it made the copy above the original, so I had to drag and drop the original blade layer to the top or over the copy.
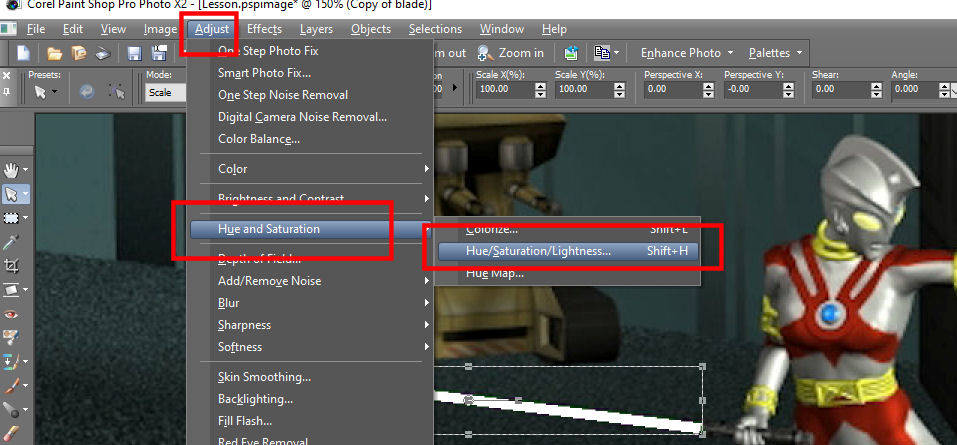
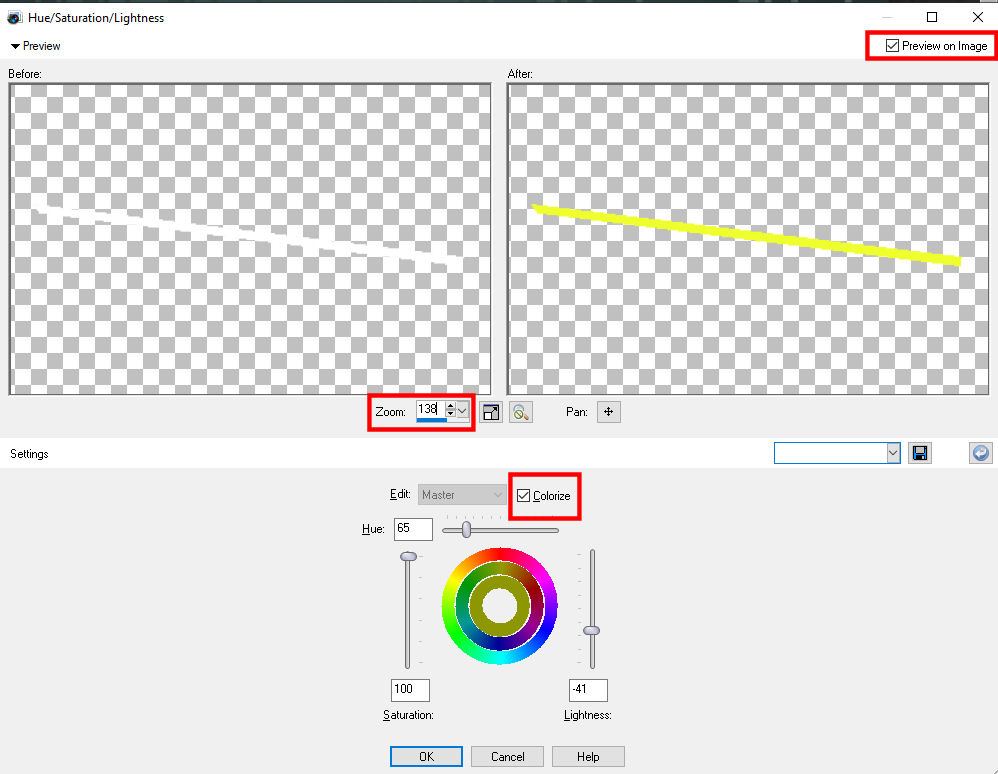
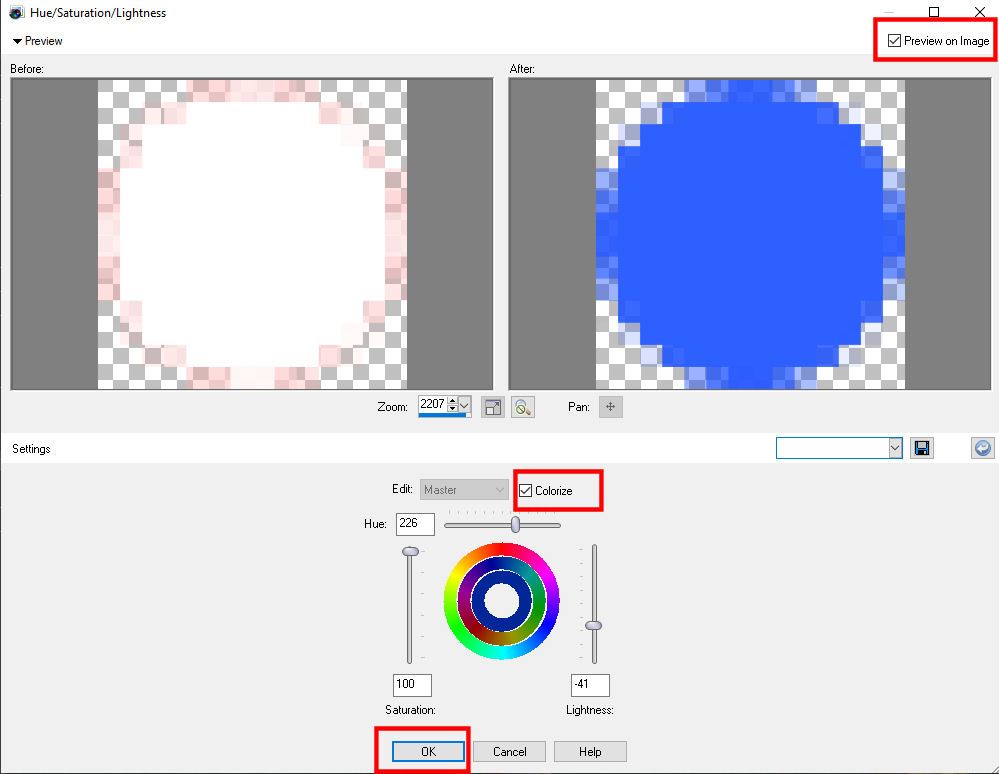
Be sure that "Preview on Image" and "Colorize" is checked. Then just use the zoom panel to get a close up zoom of your white object. Now just play around with the Saturation, Hue, and Lightness controls to get the color you are after. I was going for a very saturated yellow color.
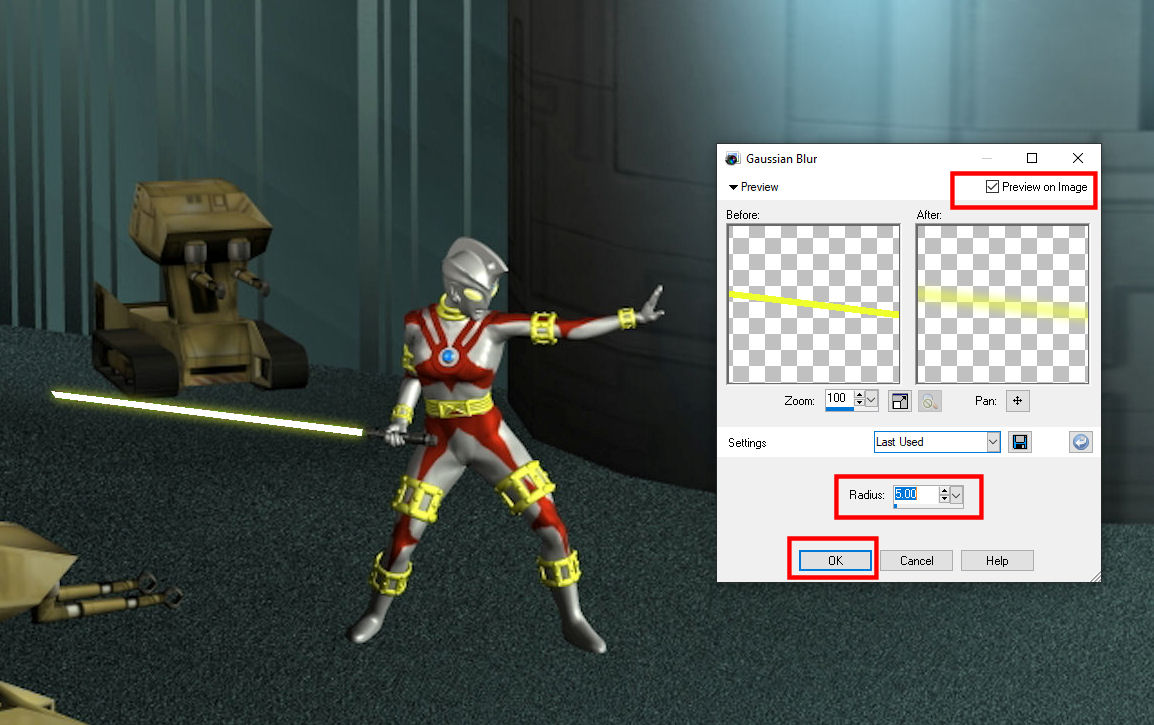
Now with the copy layer still selected, go to Adjust - Blur - Gaussian Blur. In a similar way to that last window for the Hue / Saturation / Lightness, make sure "Preview on Image" is selected and you will be able to see in real time the effect your controls are having on the main image without even pressing ok and "finalizing" your effect! I tend to use the "Gaussian Blur" most when making laser swords as it feels to me like it gives the most control. At zero there is no effect at all, too much and your "glow" soon turns into a thin or colored gas or smoke (that also is an effect you might use sometime btw). In this instance, I found a setting of 5 gave me exactly the effect I was looking for.
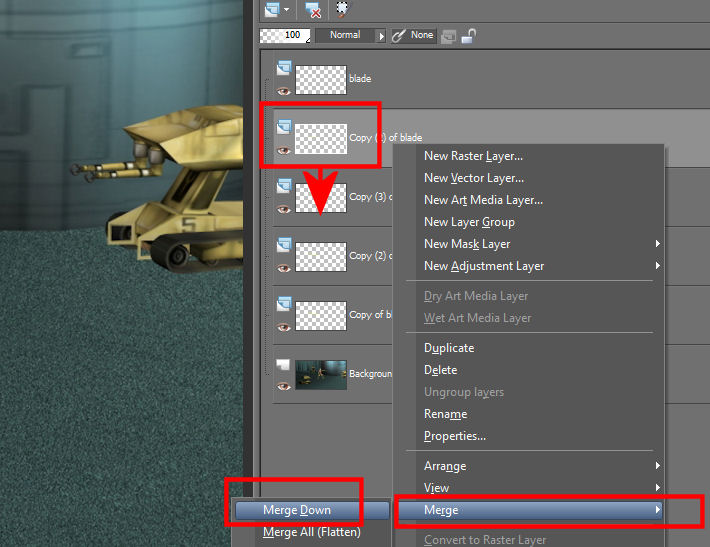
At this point you could technically be done with your "laser sword". However I have found another simple step to get more life out of this glow technique. You simply duplicate the copy layer and you will immediately notice a change in intensity and brightness! How many times to duplicate it? That is a matter of choice, but I find usually two to four times works out fine. In the pic below I had three duplicates of the copy layer.

Something to consider here, is that you can right click on the top copy layer and choose "merge down" and it will merge the current selected down one layer. You can do this a few times and clean up your work space.
2. Plasma glows -
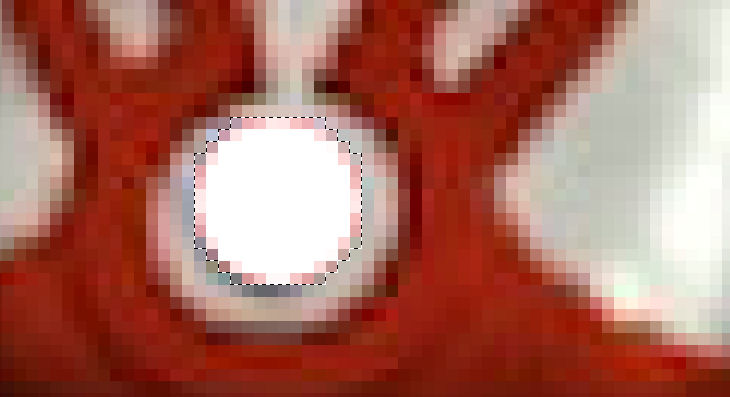
For a plasma glow, it is essentially the same principal here (just usually not in the shape of a sword blade). You are going to be making a "white hot" solid object, and duplicate that layer as before and do the same steps as above to achieve the glow. I will choose the blue dome or stone on the hero's suit for the glow. So create a new layer (call it whatever or not), and as before zoom in on the stone. You are going to be making a circular selection using point to point like before.
As before in the previous selection, fill the selection with white paint.
Hit Control+D to drop selection (and perhaps remember to set it back to rectangle type next time you use the selection tool). Select the stone layer and duplicate it, arrange it so the original stone layer is above the copy.
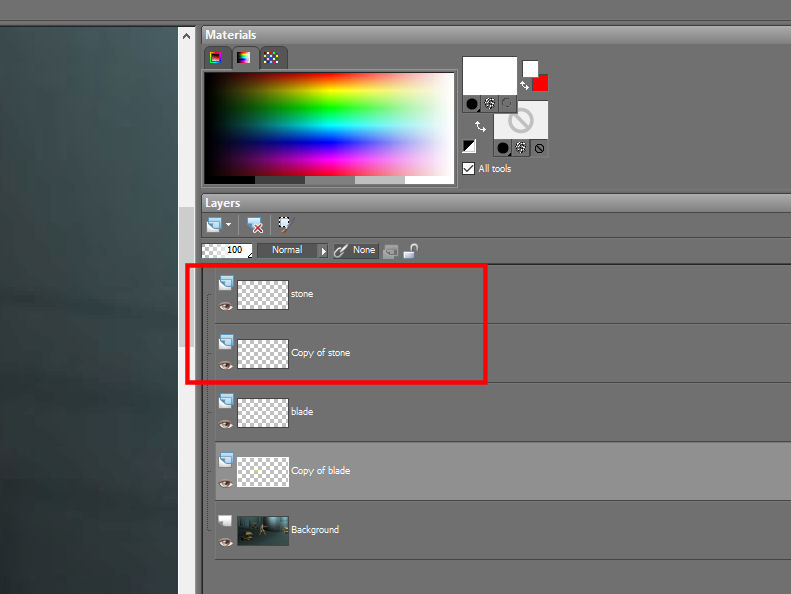
Select the copy layer and go to Adjust - Hue and Saturation - Hue / Saturation / Lightness (or Shift+H). Make sure that "Preview on Image" and "Colorize" are checked. Now play with the three dials or variables until you achieve a blue color (you might even be able to use these same settings).
You might want to duplicate the copy layer a few times as before to make it brighter. Then use merge down to clean up the layers palette. If all goes well your hero should now have an energy core chest!
3. Lightning -
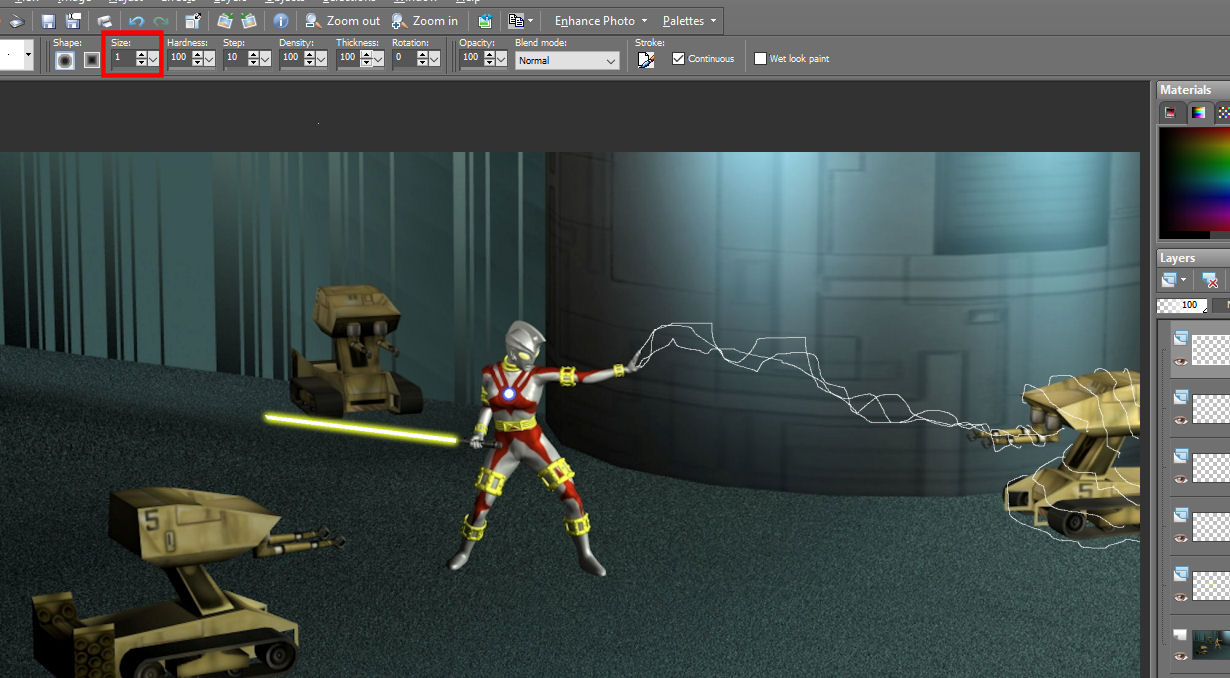
The same principle applies, but this time, you are going to be using the paint brush (B key) with a very low or small pixel setting (I set mine to 1) and you will be drawing out the lightning bolts. I made a new layer and called it "lightning", the goal here was to make energy lightning proceed out of the hero's extended hand and into the sentry droid on the right side. This will probably take several attempts to get it just how you want it. But I usually tend to go for more than one main lightning bolt (that runs close to each but not the same) that wraps around the other object, circling around it.

Then I will choose the copied sword blade that is highest in the layers palette, and go to Adjust - Brightness and Contrast - Brightness and Contrast (or hit Shift+B. Set Brightness to -255 (all the way left), and the Contrast to 100 (or all the way to the right). This should turn the white blade into a solid black color.
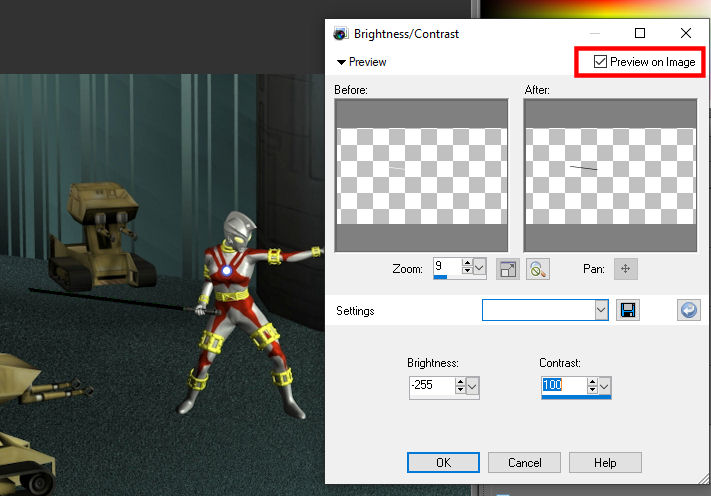
Now all it needs is a glow! I will click on the copy blade (white) right under it, then do a gaussian blur and do as many duplicates as needed. And voila! Instant dark laser sword!
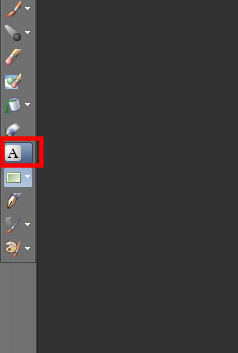
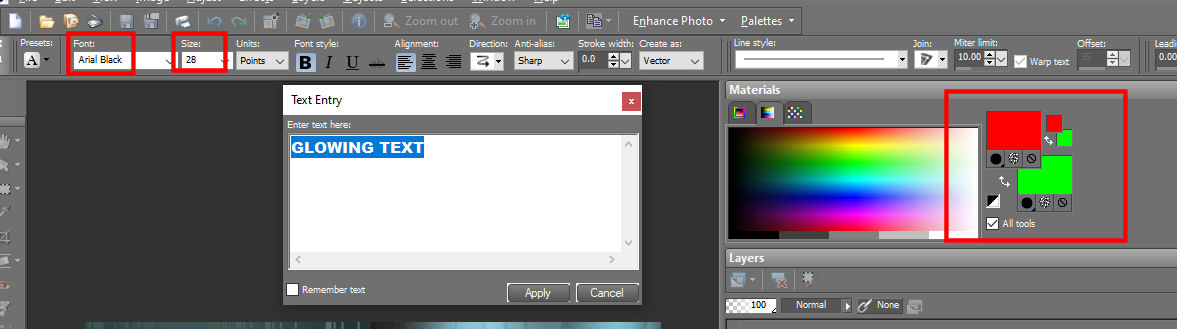
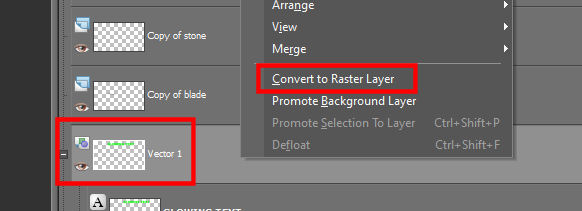
And finally I will do some glowing text to wrap up this tutorial. When we create the text it will be in a "vector" layer, and will have to be converted to a "raster" layer before Gaussian Blur can be used. On the left side select the text tool or press T.
Immediately the cursor turns into a cross with the letter A. This is like the upper right hand corner where your text will appear. Place it on the image where you want, and then the main text window appears where you will type out what you want. The main options here IMO is the "font", size, and color. If you cannot see the text when you type, it may be because one of your colors (forground or background) is blank or matching your image background color (for example white text on an all white background image etc etc). If you need to change colors of text, with the text box open, highlight your text by lett mouse dragging over all the text till it highlights blue then make your changes. I finally decided to use the Arial Black font (as like everyone has it on their pc) and made the text a bright green color.
I find for glowing text, I tend to go for the higher more extreme settings in the Gaussian Blur (where things start becoming smoke like), which seems to give the text a ghostly or alien look. I used a total of two copy layers to spice it up. Using the techniques in this tutorial, you should be able to achieve many different energy glowing effects.